My Git Workflow
One thing I’ve learned as a developer is that everyone has a slightly different git workflow. Mine is pretty simple, rarely uses anything beyond the basics (other than rebase), so, if you are an early career developer, consider trying it on for size. Let’s get started!
I’ve just grabbed a ticket, so I’m ready to get started. First things first: I need to create a new branch off main.
git checkout -b my-awesome-branch
Now that I’m on my branch, I can start making changes. I will make one small change and create a new file. Now I’m ready to commit! But first, I must validate that the changes I’m committing are precisely what I want. You might think, “Jennifer, I just made these changes; why do I need to recheck it?” While it might seem silly, you will be surprised by the changes creeping into your commits if you aren’t careful. One really common one is dependency updates. So first: we will do a git status and a git diff.

You’ll notice that I didn’t just do git status but git status -s. The -s is for “short” and I prefer that because it gives me all the information I need in a nice compact manner. The M says that a file is modified and the ? means that it’s a new, untracked file. Next, I want to do git diff which will pop up a window (by default using vim) that looks something like this:

It shows that I added one new line in README.md. You’ll notice that nothing will show up for the untracked file! Now that I’m confident that my changes are what I want them to be, I’m going to do git add -A and then run git status -s again (which I have mapped to git s).

Time for a commit! If I have a longer commit message that I want to write, I will do a full git commit. More often, I will just use git commit -m to do it all in one line.

Now, time to push it up.

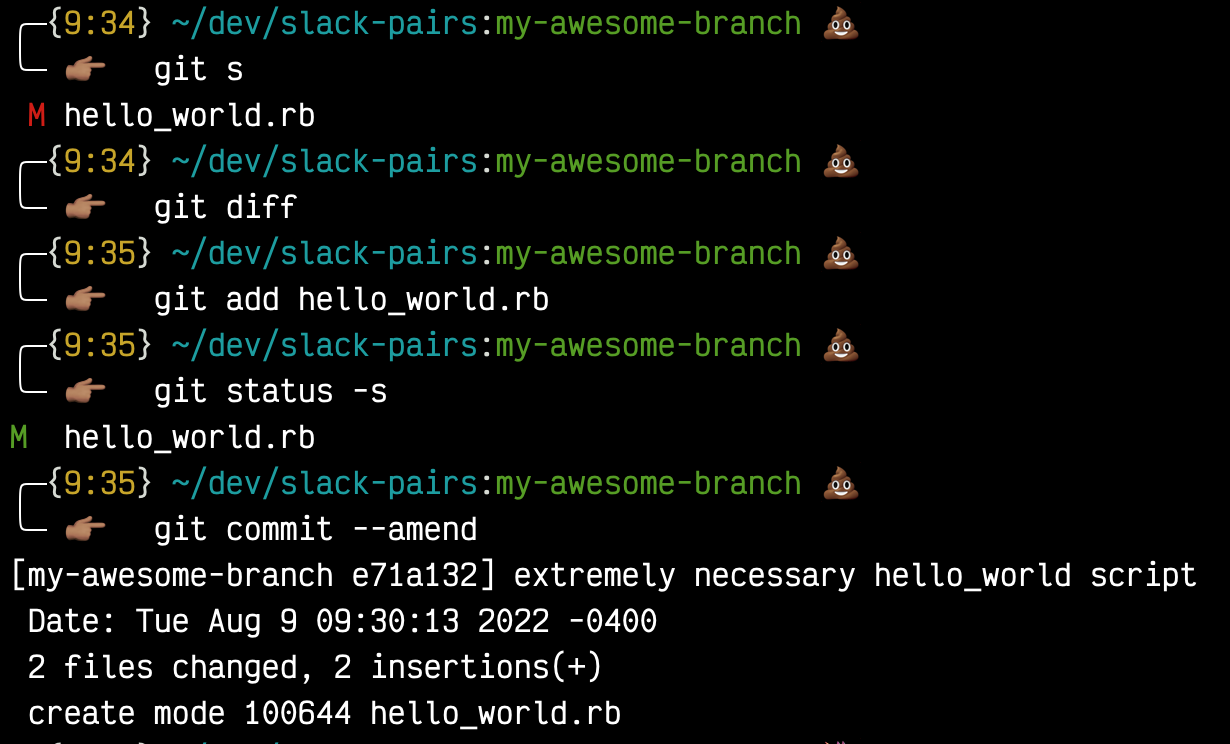
That might be all. However, like many developers, I often realize I have made a mistake. I like to pretend my mistakes never happened! Some people will just make a brand new commit with a message like “fixing typo”. Me? I pretend my typos never happened by making my changes, adding the file, then doing git commit —-amend.
There are a couple of spots in this where I couldn’t get it all in one. So here’s the git diff that happened at the 9:34 timestamp:
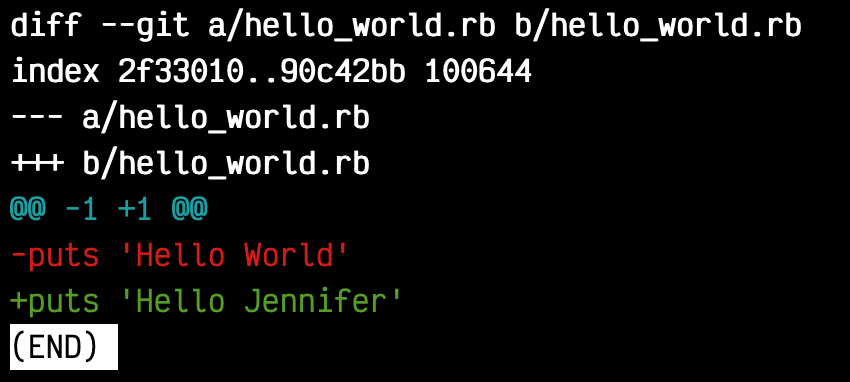
Clearly I realized that I didn’t actually want “World” but for some reason wanted my name instead. After I added the file, this is what pops up when I do git commit -—amend:
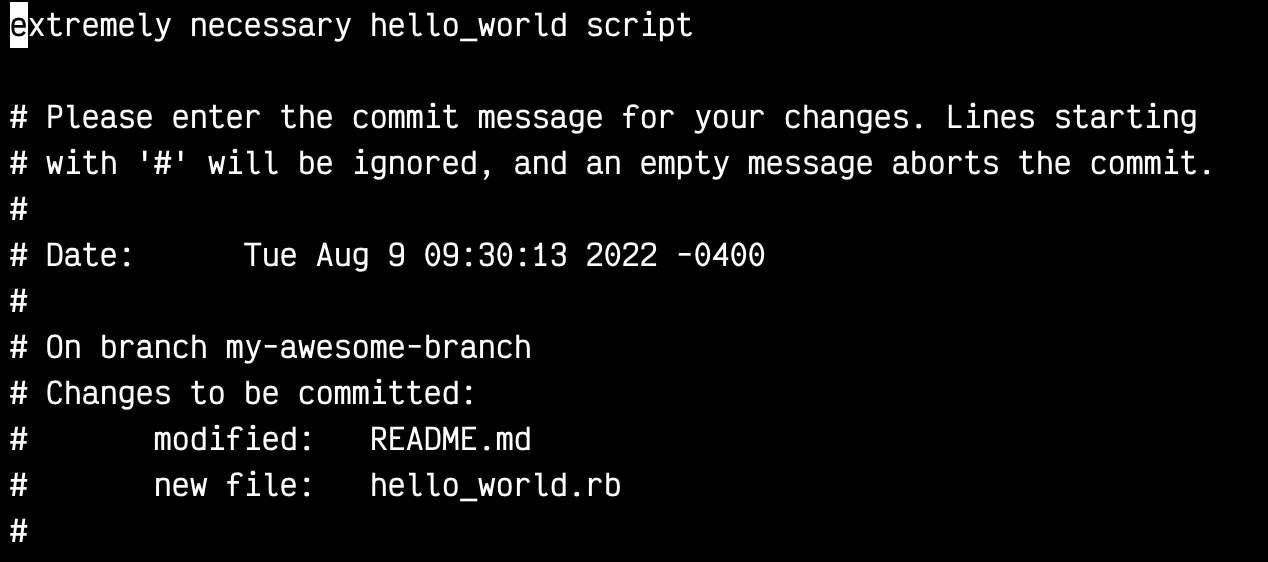
As you might be able to tell, I could also edit my commit message here! I also use amend if I have made a typo in a commit message or if I just want to expand on my initial, too short message. After amending (or rebasing), you will have to do a git push -f or a “force push”. Why? Because you are effectively rewriting git history!

IMPORTANT NOTE if you are working on the same branch as someone else, be careful about force pushing. Consider using git push —-force-with-lease instead. And always make sure to let your buddy know that you are doing this.
That’s pretty much it! It might seem like a lot, but it actually gets pretty quick pretty fast as muscle memory kicks in. If you are interested in some shortcuts, here’s an example of what my .gitconfig sometimes looks like.
What’s your git workflow? Is there something you think I should change? Let me know!